
Modern Web Development: Trends and Best Practices for 2025
April 19, 2025
Explore the latest trends and best practices shaping web development in 2025, from advanced frameworks to performance optimization techniques.
Learn how to unlock your CPU's turbo mode on Linux Fedora to access full processor performance, tested on Fedora 43 with Lenovo Ideapad laptops.
I recently switched to Fedora 43 on my Lenovo Ideapad, and something felt off. The system was sluggish, animations were stuttering, and even simple tasks felt slower than they should. After some digging, I discovered the culprit. my CPU was running at a fraction of its actual speed because turbo mode was locked.
Here’s the thing, most commercial laptops ship with turbo mode disabled to save battery, reduce heat, and keep fan noise down. That sounds reasonable until you realize your processor might be stuck at just 30-40% of its full clock speed. That’s like buying a sports car and having the manufacturer install a speed limiter that keeps you in first gear.
After hours of trial and error, I finally figured out how to unlock it permanently on Linux. This guide walks you through the exact steps I used on Fedora 43 with a Lenovo Ideapad, though it should work on other Intel-based Linux systems too.
When turbo mode is enabled, your CPU can temporarily boost its clock speed beyond the base frequency when it has thermal and power headroom. This means your system can actually use the hardware you paid for.
The difference is night and day. After enabling turbo mode on my laptop, I noticed:
If your CPU is locked at 30-40% speed like mine was, you’re looking at a potential 2-3x performance boost. That’s not a small improvement, it’s transformative.
Before you jump in, let me be honest about what you’re signing up for:
Battery Life: Your battery will drain faster. Not dramatically, but noticeably. The CPU races through tasks at higher speeds, which means more power consumption. On my Ideapad, I lose maybe 20-30 minutes of battery life compared to before.
Heat: Your laptop will run warmer under load. Not dangerously hot. modern laptops are designed to handle this. but you’ll definitely feel it. Keep the vents clear and don’t use your laptop on soft surfaces that block airflow.
Fan Noise: The fans will spin up more often and louder. During intensive tasks like compiling code or editing videos, my laptop sounds like it’s preparing for takeoff. It’s not terrible, but it’s something to be aware of.
For me, these trade-offs are completely worth it. I mostly use my laptop plugged in, and the performance gains far outweigh the downsides. But if you’re constantly on battery or need a silent machine, you might want to think twice, or at least be prepared to toggle between power profiles depending on your situation.
This guide assumes you have:
First, let’s make sure your system uses the Intel pstate driver. open a terminal and run:
ls /sys/devices/system/cpu/intel_pstate/If you see a bunch of files listed, you’re good to go. If you get “No such file or directory,” this guide won’t work for your setup.
Here’s what took me way too long to figure out. The trick is creating a script that persistently tries to enable turbo mode at boot, with retry logic to handle the quirky timing issues.
The first thing we need is a retry script that doesn’t give up easily.
Here’s the annoying part: even when you tell systemd to wait for power-profiles-daemon to start before running your script, the daemon lies. It announces “I’m ready!” before it actually finishes talking to your laptop’s hardware.
So when my initial script tried to enable turbo mode immediately, the hardware was like “Nope, I’m still booting up” and threw “Operation not permitted” errors. I tried adding fixed sleep delays, but the timing varied between boots. sometimes 30 seconds was enough, sometimes it took a full minute.
The solution? Stop guessing and use a retry loop. The script keeps checking and trying until the hardware finally unlocks and accepts the change. It works every time, regardless of how long your specific hardware takes to initialize.
Let’s create the script. Open your terminal and run:
sudo nano /usr/local/bin/force-turbo.shNow paste in this script:
#!/bin/bash

# Try up to 20 times (approx 100 seconds)
for i in {1..20}; do
    echo "Attempt $i: Unlocking Lenovo Hardware..."

    # 1. set the performance mode
    /usr/bin/powerprofilesctl set performance

    # 2. Try to force Turbo ON
    echo 0 > /sys/devices/system/cpu/intel_pstate/no_turbo

    # 3. VERIFY: Did it actually stick?
    CURRENT_STATUS=$(cat /sys/devices/system/cpu/intel_pstate/no_turbo)

    if [ "$CURRENT_STATUS" -eq "0" ]; then
        echo "Success! Turbo is ON."
        exit 0
    fi

    echo "Failed (Locked). Waiting for firmware..."
    sleep 5
done

echo "Gave up after 20 attempts."
exit 1
Save the file (press Ctrl+O, then Enter) and exit nano (Ctrl+X).
Now make it executable:
sudo chmod +x /usr/local/bin/force-turbo.shIf you’re on Fedora like me (or RHEL, CentOS), you need to tell SELinux about this script:
sudo chcon -t bin_t /usr/local/bin/force-turbo.shThis gives the script the right security context. Skip this step if you’re on Ubuntu or other non-SELinux distros.
Now we need to make this script run automatically every time you boot. We’ll create a systemd service for that.
Create the service file:
sudo nano /etc/systemd/system/force-turbo.servicePaste this configuration:
[Unit]
Description=Force Enable Turbo (Retry Loop)
After=multi-user.target power-profiles-daemon.service

[Service]
Type=simple
# It bypasses SELinux restrictions
SELinuxContext=system_u:system_r:unconfined_service_t:s0

# Point to our new smart script
ExecStart=/usr/local/bin/force-turbo.sh

# Give it time to finish the loop without Systemd killing it
TimeoutStartSec=120

[Install]
WantedBy=multi-user.target
Save and exit again.
A quick note about that SELinuxContext line. it gives the service more permissions than usual. This is necessary because enabling turbo mode requires low-level hardware access that SELinux normally blocks. The TimeoutStartSec=120 gives our retry loop enough time to complete without systemd killing it.
Now let’s activate everything:
sudo systemctl daemon-reload
sudo systemctl enable --now force-turbo.service
The --now flag starts the service immediately and also enables it to run on every boot.
Time to test it:
rebootAfter you reboot, give the system about 2 minutes to work through the retry loop. The script will try up to 20 times with 5-second waits between attempts, so it might take a bit.
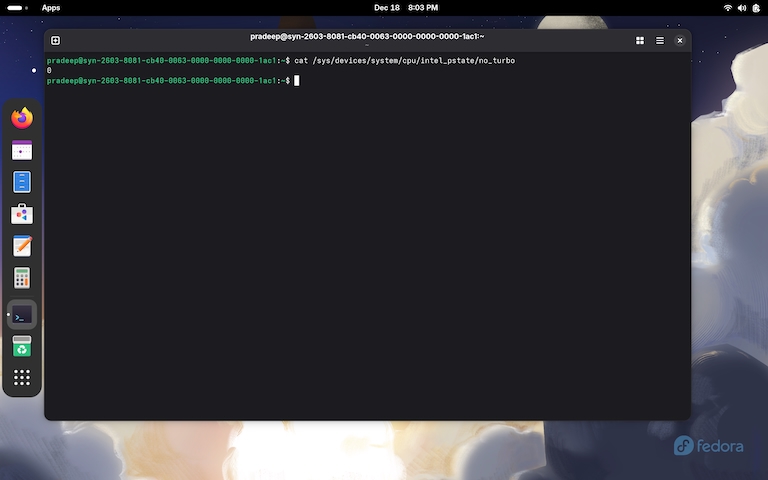
Once you’re logged back in and have waited a couple minutes, let’s check if turbo mode is actually enabled:
cat /sys/devices/system/cpu/intel_pstate/no_turboIf you see 0, congratulations! Turbo mode is enabled. If you see 1, something went wrong and turbo is still disabled.
You can also watch your CPU frequencies in real-time:
watch -n 1 "grep MHz /proc/cpuinfo"This refreshes every second and shows the current frequency of each CPU core. Open something CPU-intensive (like compiling code or opening a heavy application) and watch the numbers jump way above your base clock speed. It’s oddly satisfying to see your CPU actually working at full speed for once.
If you’re still seeing 1 instead of 0, here’s how to debug it:
Check if the service actually ran:
sudo systemctl status force-turbo.serviceLook for “Success! Turbo is ON” in the output. If you see errors, that’s your first clue.
Look at the logs:
sudo journalctl -u force-turbo.service -n 50This shows the last 50 lines of output from our script. You should see all the retry attempts and whether they succeeded or failed.
Check your BIOS:
Some laptops lock turbo mode at the BIOS level. Restart your computer, enter BIOS/UEFI settings (usually by pressing F2, F10, or Delete during boot), and look for anything related to “Intel Turbo Boost,” “Performance Mode,” or “CPU Power Management.” Make sure it’s not disabled there.
Try manually enabling it:
This helps determine if it’s a timing issue or a permissions problem:
sudo powerprofilesctl set performance
echo 0 | sudo tee /sys/devices/system/cpu/intel_pstate/no_turbo
cat /sys/devices/system/cpu/intel_pstate/no_turbo
If this works but the service doesn’t, it’s a timing or permissions issue. If even this fails, you might have a BIOS-level lock.
In case you’re curious about the technical details:
The script does three main things on each retry attempt:
First, it sets the power profile to “performance” using powerprofilesctl. This tells the system you want maximum performance, not power savings.
Then it writes 0 to /sys/devices/system/cpu/intel_pstate/no_turbo. This file controls turbo mode, 0 means enabled, 1 means disabled.
Finally, it reads that same file back to verify the change actually stuck. If it’s still 1, the hardware hasn’t unlocked yet, so the script waits 5 seconds and tries again.
The SELinux unconfined context in the service file lets the script bypass normal security restrictions, which is necessary for messing with CPU settings. And the systemd service makes sure all of this happens automatically every time you boot, so you never have to think about it again.
Now that you’re running with turbo enabled, here are some tips I learned the hard way:
Watch your temperatures: Install lm-sensors lib and run occasionally to check CPU temps. If you’re regularly hitting 90°C or above, that’s too hot. Modern CPUs will throttle themselves to protect against damage, but it’s better not to push them that far.
Keep vents clear: This sounds obvious, but seriously, don’t use your laptop on soft surfaces like beds or couches. Keep those air vents unobstructed, especially during heavy workloads.
Switch power profiles when on battery: When I’m unplugged and don’t need maximum performance, I switch to balanced or power-saver mode:
powerprofilesctl set balancedThis disables turbo mode temporarily and extends battery life significantly.
Clean your laptop occasionally: Dust buildup in the cooling system will cause thermal throttling, which defeats the whole purpose of enabling turbo mode. If you’re comfortable opening your laptop, blow out the fans and heatsinks every few months.
Getting turbo mode to work properly on Linux took me way more time than it should have, but the performance improvement was absolutely worth it. My Lenovo Ideapad went from feeling sluggish and frustrating to actually responsive and fast. Compile times dropped, applications launched instantly, and everything just felt smoother.
The retry-based approach in this guide is the key to making it work reliably. Fixed sleep delays never worked consistently for me, but the retry loop has been rock solid across multiple reboots and even after system updates.
Yes, you’ll trade some battery life and deal with more fan noise. But if you’re like me and use your laptop plugged in most of the time, you’re essentially getting a free upgrade to your CPU performance, sometimes as much as 2-3x faster for intensive tasks.
Just remember to keep an eye on temperatures and maintain your cooling system. Your laptop is now working harder, so it needs proper airflow to keep those speeds up without throttling.
If this helped you unlock your CPU’s full potential, let me know! I’m always curious to hear how this works (or doesn’t work) on different setups.